The post 5 Reasons You Need A Banana In Your Daily Diet appeared first on falafelandcaviar.com.
]]>But actually committing to a diet of tofu, soy milk and quinoa can be a lot easier said than done. The good news is your favorite fruits can fit into this diet plan perfectly, making the transition not nearly as tough to swallow. And there’s a specific fruit that goes above and beyond in health gains for your body – the banana!
Over 100 billion bananas are eaten across the world every year, and are the subject of more songs than any other fruit.
Whether you’re already enjoying your fair share of this fabulous fruit, or you need more convincing, here are five benefits to eating bananas regularly.

They Are Loaded With Nutrients
It’s no secret bananas provide a healthy dose of potassium, but did you know they’re rich in Vitamin B-6, Vitamin C, magnesium and fiber too? One banana can give you about 1/4 of the recommended daily amount of B-6, and its absorption rate is unmatched by dietary supplements. And while citrus-type fruits are the first that come to mind for Vitamin C, a medium-sized banana actually provides 15% of your daily requirement. All in all, the nutrients in bananas can reduce risk of cancer, improve cognitive function, aid bone health and strengthen the immune system.
They Can Help You Lose Weight

Trying to incorporate bananas into a healthy diet? One of the most interesting effects of fiber (one banana provides 12% of your daily value) is that it slows down digestion, helping you feel fuller for longer. Even the simple smell of a banana has been shown to suppress appetite and reduce hunger pangs. So when you’re searching for a satisfying snack that won’t kill your diet, bananas are the way to go.
They Lower Blood Pressure
Speaking of health, studies show bananas can help lower the silent killer that is high blood sugar. Potassium Citrate, which we previously mentioned bananas have plenty, is effective in controlling blood sugar. In fact, consuming this important nutrient regularly has been shown to decrease blood sugar significantly. And being nearly sodium-free in comparison, bananas help neutralize the effects of a high sodium intake, which in turn, keep the heart healthy too.
They Make You Happy

It’s true. Bananas not only have mood-boosting B9, but they also have tryptophan which is a precursor for serotonin, one of the most important chemicals in the brain. That’s because it’s a natural anti-depressant that combats fatigue, anxiety, anger and more. They’re a natural, real food source to promote positivity, reduce stress and fight depression. And a banana before bed could help you relax and regulate sleep.
They’re A Great Post-Workout Snack
Why do athletes love bananas so much? Well, for starters, they provide antioxidants and other nutrients necessary to endure long, hard workouts naturally. As a mid- or post-workout snack, they’ve been proven to fuel performance as well as sports drinks do, giving you an alternative healthier carbohydrate source. Even further, they convert quickly into energy, helping boost muscles and improve recovery time.
With facts like these, America’s yummiest fruit just got a whole lot more satisfying. So next time you’re craving a snack that’s healthy AND delicious, just grab a banana!
The post 5 Reasons You Need A Banana In Your Daily Diet appeared first on falafelandcaviar.com.
]]>The post Become A Vegan Grill Master With These 5 Mouthwatering Recipes appeared first on falafelandcaviar.com.
]]>These are different times we live in, so as the grill master, you need to evolve your skills. Whether you’re a vegan or you have friends who are, take some time to digest these following vegan recipes for the ultimate backyard barbeque.
Did You Know Vegans Love Steak?
 IT IS SO DELICIOUS!!! I usually eat brown rice but I wasn’t feeling it this week- and if you aren’t excited about your food then you’re cooking the wrong thing. . . . #portobellomushroom #steak #portobellosteak #rice #broccoli #plantbased #veganrecipes #whatveganseat #vegetarian #vegetables #whatvegeterianseat #preworkout #soysauce #homemade #foodie #motivation #goodfood #delicious #nom #cookforyourself #healthylifestyle #fitmotivation
Yes, it’s true! Vegans love steak. Grilled portobello steak, that is. Sure, it’s not meat, but replacing a hefty slab of beef with a portobello mushroom makes for a surprisingly filling dish that everyone can enjoy.
Just like a real steak, this portobello steak is best if you marinate it first. Take some balsamic vinegar, paprika, and steak sauce to make a nice marinade for your mushroom. Then just throw it on the grill and top with a simple pesto aioli using avocado as your base instead of mayo.
Cheap Beer Has Multiple Uses
 #TraegerGrills #TraegerFightNight
Cheap beer isn’t just for getting drunk. It’s surprisingly good for cooking beer can chicken. Since this is a vegan barbeque, though, let’s try our hand at beer can cabbage.
The recipe is surprisingly similar to that of the chicken variety. Start by hollowing out the inside of a purple cabbage and then baste it with barbecue sauce. Stick an open car of beer—the cheaper, the better—inside the hole and set the cabbage on top of the grill.
When finished, you can either slice it up for a succulent side dish or pile it into some buns with vegan cheese, jalapeños, and crispy coleslaw for a vegetarian take on pulled pork.
Give Veggie Burgers Some Respect
 Brushed with a sweet and spicy sriracha glaze and topped with coconut bacon! Recipe link in profile
  https://fullofplants.com/smoky-tempeh-black-bean-burgers/
For years, veggie burgers have always been the number one target for meat lovers. It’s true that the majority of frozen veggie patties you’ll find at the supermarket are tasteless pieces of rubber, but it doesn’t have to be that way.
It’s time to give the veggie burger the respect it deserves. Try this one on for size. Using sweet potatoes, faro, walnuts and Panko bread crumbs, form a hearty patty, chock full of flavor.
Meatless In Mexico
 Do you prefer a hard shell or soft shell
 #tacotuesday #vegan #veginspired #tacos #vegantacos #yummmmm
Try to find someone who hates tacos—they are few and far between! Adding tacos to your grill menu is a surefire way to impress. Even without meat, these tasty pockets of love will blow everyone’s mind.
To start, grill up some avocado halves and veggies, spiced with traditional taco seasoning. Stick those in your grilled corn tortillas, top with hot sauce, vegan cheese, and cilantro, and you’re good to go.
If you want to get even crazier with it, grill up some extra-firm tofu for an extra helping of protein.
Yellow Polka Dot Zucchini
https://www.instagram.com/p/BaH6O89h3qA/?tagged=zucchiniboats
Ok, these zucchini boats aren’t yellow, nor are they covered in polka dots—but let’s just pretend they are for the sake of sticking with the summer theme.
These grilled zucchini boats are incredibly easy to make. Simply cut a zucchini in half and then add a bit of olive oil. Grill them to perfection (like you always do) and top with the vegetables of your choice.
For example, some vegan cheese, green onion, and pearl tomatoes make for a nice Mediterranean-inspired meal. Go crazy!
The post Become A Vegan Grill Master With These 5 Mouthwatering Recipes appeared first on falafelandcaviar.com.
]]>The post Get Your Egg Roll Fix Without The Wrapper, Or Having To Tip For Delivery appeared first on falafelandcaviar.com.
]]>Well then, try this simple recipe for egg roll bowls and have your egg roll fix without having to order takeout.
 #ViViAnnesKitchen #Homemade #eggrolls #springrolls
A Tasty Takeout Treat
Classic egg rolls are filled with sauteed shredded cabbage, ginger, scallion and garlic with ground pork or chicken. Some variations include adding sauteed shiitake mushrooms and carrots. All are wrapped in a thin egg-based dough – hence its name.
If you crave that egg roll flavor but don’t want to scour the town looking for specialty wrappers, try building the ingredients in a bowl or casserole.
Let That Cabbage Shine
Start by cooking up some ground pork or chicken in a large saute pan or wok in a little bit of vegetable oil. Once that is cooked through, spoon it off onto a plate and add a bag of undressed coleslaw (shredded cabbage and carrots) into the pan. Add sliced green onions, minced ginger and garlic, and a healthy dose of salt and pepper. Sautee until lightly wilted – you do not want a pile of mush – toss in the cooked ground meat and transfer the whole thing to a casserole dish or large bowl. Top it all off with crispy fried low-mein or flat noodles, as a perfect stand-in for the egg roll wrappers.
Spoon out your deconstructed eggrolls and enjoy with some duck sauce or soy sauce on the side.
https://www.instagram.com/p/BL7Rr5jBkbE/?tagged=eggrollbowls
The post Get Your Egg Roll Fix Without The Wrapper, Or Having To Tip For Delivery appeared first on falafelandcaviar.com.
]]>The post These Chicken Parmesan Stuffed Peppers Combine The Best Of Two Recipes appeared first on falafelandcaviar.com.
]]>It’s true. The standard chicken parmesan recipe we all know and love is far from broken, but that doesn’t mean we can’t experiment with new ideas, right? This revolutionary chicken parmesan recipe doesn’t have to replace the tried and true method of old, but it’s a nice way to freshen things up in the kitchen.
Whether you need food for a party, the family, or even just for yourself, these chicken parmesan stuffed peppers will hit the spot (and then some).
The Tools For The Job
The best part about making these chicken parm stuffed peppers is how easy they are. With just nine ingredients and an hours worth of time, you can bring a hefty plate of deliciousness into the world. So let’s take a look at what you need.
Ingredients
- 2 large bell peppers (halved)
- 3 cups of shredded, mozzarella cheese
- 1/2 cup of Parmesan cheese
- 1 1/2 cups of marinara sauce (homemade or canned)
- 1 Tbsp. of minced garlic
- 1 Tbsp. of finely cut parsley
- 1 pinch of red pepper flakes
- 12 oz. breaded chicken strips
- 1/2 cup of chicken broth
Now that you have your ingredients ready to go, it’s time to move on to the preparation.
Always Be Prepared
Some people are rogue chefs in that they don’t play by the rules and cook freely. That’s all fine and good, but leave that for the pros. You don’t want to be running around chopping onions and simmering sauces all at the same time.
It helps to have everything prepped and ready to go so the cooking process is quick and painless. You can start this recipe by cutting your bell papers in half and cleaning out their pits and seeds. Once done, set them aside on a rack above a roasting pan.
Next, grab a large mixing bowl and combine your mozzarella, Parmesan cheese, marina sauce, garlic, parsley, red pepper and breaded chicken strips. Stir it all together until the chicken strips are thoroughly coated.
Once you’re confident in your chicken coating abilities, stuff the chicken mixture into the pepper halves you set aside earlier. Don’t go overboard here, but put a healthy dose of the mixture in each one.
The reason for this is we’re going to sprinkle plenty of extra cheese on top of both stuffed peppers. After that, pour the chicken broth into the bottom of the roasting pan, set your peppers on top of the rack, and bake for 55 minutes at 350º F.
Your Life Will Never Be The Same
https://www.instagram.com/p/BeIknAIArQz/?tagged=stuffedpeppers
When you see the cheese bubbling with a slight golden brown color, you’ll know you did the right thing. With just 15 quick minutes of prep and under an hour of cooking time, you’ve created a flavorful masterpiece.
Not only does it taste great, but with all that extra time to spare, think of what you can get done? You could give Sparky an extra 30 minutes of walking around the neighborhood. You can squeeze in one more episode of Friends. Or maybe—just maybe—you’ll pick up that book you’ve been meaning to read for the past year.
Cooking at home opens up a wealth of possibilities for your taste buds and your life, so start spending more time in the kitchen now!
The post These Chicken Parmesan Stuffed Peppers Combine The Best Of Two Recipes appeared first on falafelandcaviar.com.
]]>The post Pepperoni Pizza Quiche That’ll Make A Delicious Breakfast—Or Dinner, Snack, Etc. appeared first on falafelandcaviar.com.
]]>You didn’t know you had such a gaping hole for pizza quiche, but alas, it’s there, and it needs to be filled. Thankfully, the good folks at Pillsbury decided to offer a solution. Today, we’re taking a long, romantic look at it. Come together, pizza lovers, and rejoice in this pizza quiche that will change the way you perceive your favorite food.
Tricks Of The Trade
If you really want to master this pepperoni pizza quiche recipe, you’ll need to know the right tricks of the trade. It all starts with the proper ingredients. So take some time and get to know the following items on this list.
- 1 box Pillsbury refrigerated pie crusts (softened as it says on the box).
- 1/2 lb. lean (around 80%) ground beef
- 1 four oz. can of mushroom pieces (drained)
- 1/2 teaspoon of minced garlic in water
- 1/2 cup pepperoni slices
- 1 cup shredded mozzarella cheese (4 oz)
- 2 plum tomatoes, thinly sliced
- 3 eggs
- 1 cup half and half
- 2 teaspoons all-purpose flour
- 1/4 cup grated Parmesan cheese
- 1 tablespoon chopped fresh parsley ( if you want)
And So It Begins
Now that you’ve compiled all the necessary tools for the job, it’s time to get to work. Be patient. Before too long, you’ll have an expertly crafted pepperoni pizza quiche that warms your heart and fills your stomach.
Our journey begins with an oven. Heat it to 425º F and place your pie crust in a 9-inch pie pan as directed on the box for “One-Crust Filled Pie.” Bake that for five minutes, and remove from the oven. Reduce the oven temperature to 350º F.
Meanwhile, cook your ground beef over medium high heat in a skillet and stir frequently until thoroughly cooked. Drain the liquid then stir in your mushrooms, Italian seasoning, and garlic. Cook for another two to three minutes, making sure to stir occasionally until mixture is evenly heated.
Upon finish, spoon the mixture into your partially baked pie crust and top evenly with pepperoni, mozzarella cheese, and tomatoes. In another bowl, whisk some eggs while adding in half-and half and flour until well incorporated.
A Thing Of Beauty
 PEPPERONI PIZZA QUICHE INGREDIENTS 1 unbaked 9-inch (4 cup volume) frozen pie shell1 pkg. (8 oz.) shredded Italian-blend cheese, divided 2 ozs. thinly sliced pepperoni (about 20 to 30, 1 1/2 to 2-inch diameter slices), cut into quarters, divided1 can (12 fl. oz.) NESTLÉ CARNATION Evaporated Milk 3 large eggs, beaten 2 tablespoons all-purpose flour 1 teaspoon dried basil leaves1/8 teaspoon garlic powder INSTRUCTIONS PREHEAT oven to 350° F. SPRINKLE 1 cup cheese and half of pepperoni pieces onto bottom of pie shell. WHISK evaporated milk, eggs, flour, basil and garlic powder in medium bowl until blended. Pour mixture into pie shell. Sprinkle with remaining cheese. Decorate top with remaining pepperoni pieces and any other topping you like. Place quiche on baking sheet (if pie pan is made of aluminum foil). BAKE for 40 to 45 minutes or until knife inserted near center comes out clean. Cool for 5 minutes before serving. TIP: • Choose 1/4 cup of any of your favorite toppings (such as chopped onions, red or green peppers or sliced black olives) and add as topping with the remaining pepperoni pieces.
Pour this mixture over the tomatoes and top it all off with grated Parmesan cheese. Return it to your oven and bake at 350º F for 25 to 35 minutes, or until center is puffed. Insert your knife and pull out to check it comes out clean.
Once it’s done, remove your quiche from the oven. Finish it with a dash of parsley and let rest for 10 minutes before serving. As always, be sure to enjoy the finished product and appreciate your hard work.
The post Pepperoni Pizza Quiche That’ll Make A Delicious Breakfast—Or Dinner, Snack, Etc. appeared first on falafelandcaviar.com.
]]>The post Master The Art Of Seafood With These Five Helpful Cooking Tips appeared first on falafelandcaviar.com.
]]>If cooking fish is something you fear deeply, please relax. It’s really not so scary, as long as you have the right knowledge. Take a few moments and read the following fish facts. By the end, you’ll feel like a seasoned veteran.
It All Starts At The Store

If you have a bad plate of fish, don’t always blame the cook. Sometimes the root of the problem goes all the way back to the fish itself.
The most important part of preparing and cooking a delicious fish is buying the best quality possible. That’s more difficult than you think, as loads of questionable seafood exist all over the world.
Your best bet is to find a local fish monger who you can trust and who knows their stuff well. The freshest fish should have a little smell, but not strong at all. Once you find your dream catch, it’s time to store it.
Cold And A Little Moist
https://www.instagram.com/p/BZzM7TIhs6h/?tagged=fishonice
When it comes to storing fish, all you need to know is the sentence “cold and a little moist.” If you’re not going to cook the fish for a day or two, wrap it up in plastic or parchment paper and set on top of an ice bowl in your fridge.
You don’t want to freeze the fish or put it in a bowl of water. Too much of either will break down the fish. Ideally, it’s best to cook fish the same day you get it. If that’s the case, just keep it in your fridge until you’re ready to use it.
Skin On Or Off For Salmon?
One of the biggest mistakes for cooking healthy wild salmon is taking the skin off before cooking. Whether or not you plan to eat the skin, make sure to leave it on during the cooking process.
If you want to remove it, then cook the salmon skin side up. Cooking it skin side down though will help develop a delicious, crispy layer of your salmon. Both ways, the skin helps to seal in flavor and those valuable juices.
Protect The Tuna
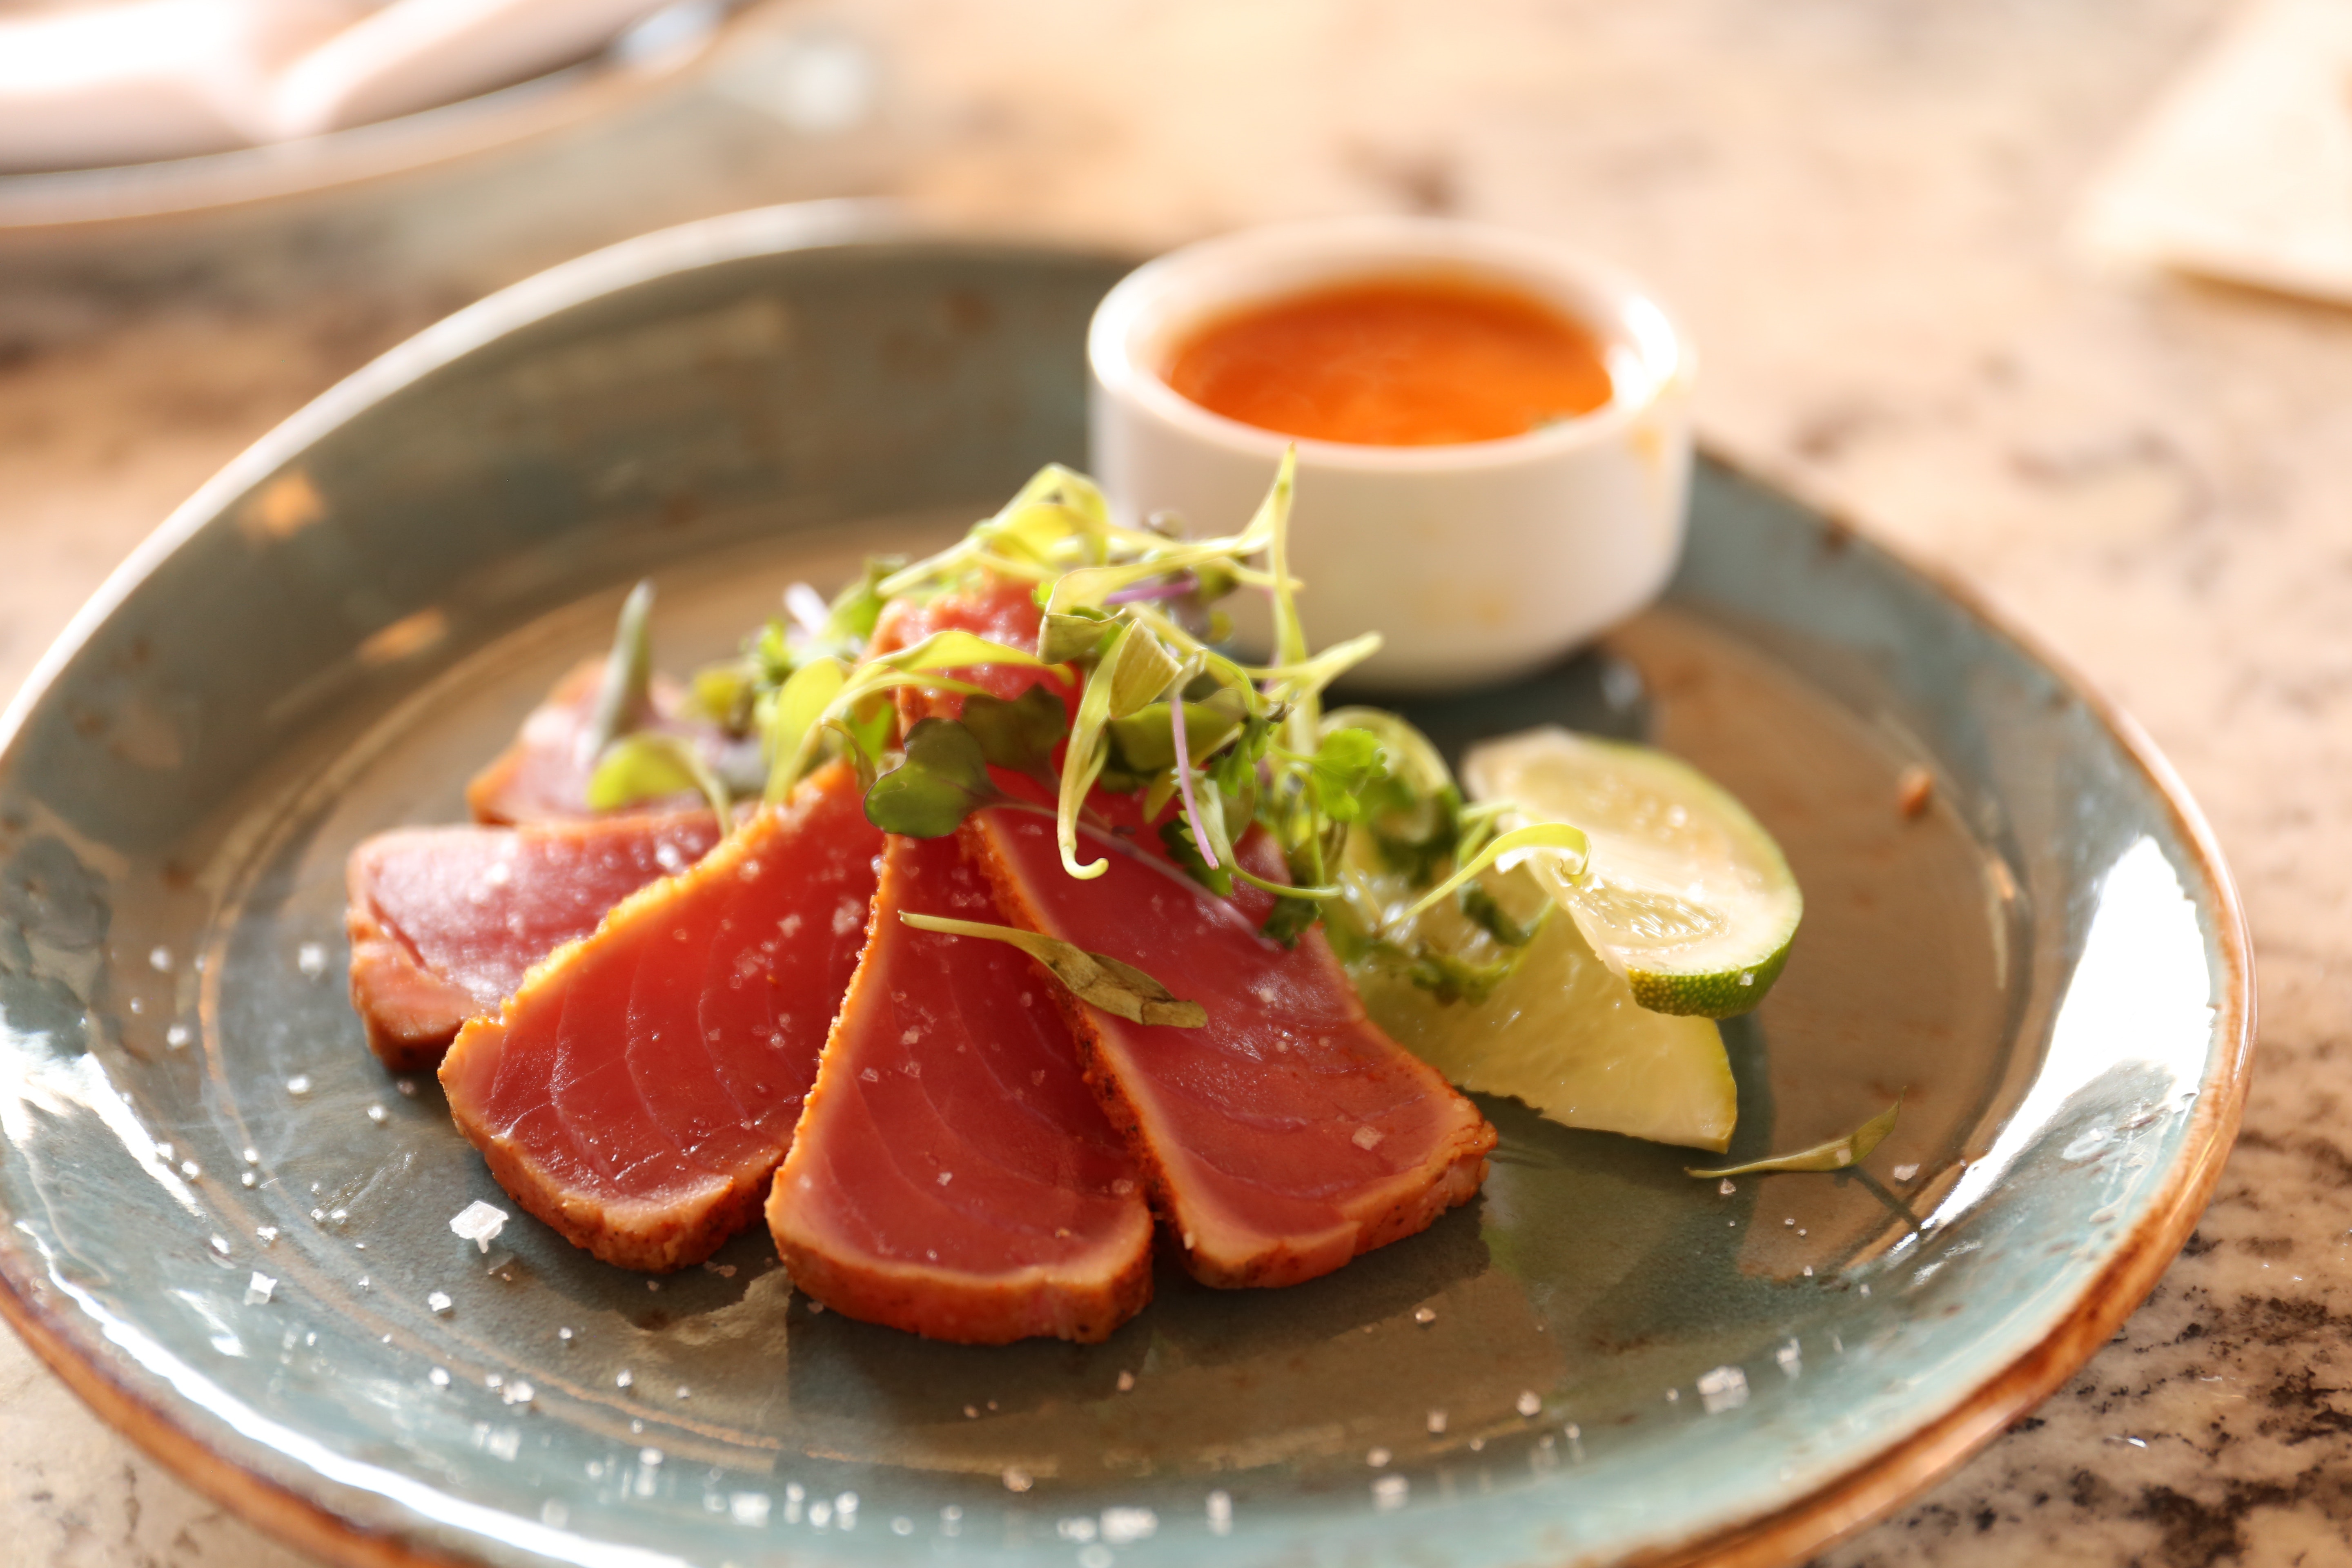
There are a few errors one can make when cooking a tuna steak, but the most significant mistake is choosing Pacific Bluefin Tuna. Even if it’s your favorite tuna in the world, avoid it if possible. Not only is it comically expensive, but this tuna is incredibly close to extinction.
Instead, go for a yellowfin tuna, also known as ahi. It’s relatively easy to find in the market and has a similar taste to bluefin.
Tuna is at its absolute best when not overcooked. The bare minimum is just a quick sear, leaving you with a rare, sushi-like tuna. Of course, if you want it to be cooked more, just cook it until it starts to flake but stays pink in the middle.
Use More Beer!

If you needed an excuse to buy more beer, here it is. When cooking authentic fish and chips, the best batter is one made with beer. By dipping your fish in flour and then beer batter, everything will coat evenly and crisp up to perfection.
When frying, your cooking oil should be no lower than 320º F and no higher than 375º F. We can’t stress enough—the best-fried fish is all about the batter. To take it to the next level, serve with healthy doses of lemon and tartar sauce.
The post Master The Art Of Seafood With These Five Helpful Cooking Tips appeared first on falafelandcaviar.com.
]]>The post This Simple Quiche Recipe Is So Decadent, You’ll Feel Like A French Chef! appeared first on falafelandcaviar.com.
]]>Even though classic eggs and a side of bacon or ham may fit your morning fancy, sometimes you feel like giving your palate some flavorful flair. A quiche is a savory pastry filled with eggs and other toppings of your choice. This simple yet delicious recipe is absolutely eggcellent!
This bite-size quiche recipe allows you to get your fill of broccoli, ham, and eggs in a delectable, tiny portion. Serve these elegant miniature quiches for any meal or as a savory and satisfying snack. This recipe serves up eight tiny quiches, and here’s how to get started.
Ingredients
- 1 pie crust
- 1 tablespoon of butter
- 1/2 cup of chopped broccoli
- 2 tablespoons of chopped onion
- 1 egg
- 1/3 cup of chopped cooked ham
- 1 and 1/3 cup of half-and-half
- 1 teaspoon of Dijon mustard
- 1/3 cup of shredded cheddar cheese
- salt and pepper
Prepare The Pie Crust
Use the large, circular crust cutting tool to make eight individual circles out of the pie crust. Place the eight pie circles into the wells of a pan and press them down so that they are wrapped around the edges.
Get The Flavorful Filling Ready
https://www.instagram.com/p/1677mtCKx0/?tagged=broccoliquiche
Melt the butter in a small skillet over medium heat. Saute the chopped onion and broccoli for three to five minutes, or until they are tender. Stir the chopped ham into the mix and saute the ingredients for another minute. Remove the broccoli, ham, and onion from the heat and set aside.
Time To Get Cheesy
Whisk the cream, egg, and mustard together in a medium-sized bowl. Throw in a pinch of salt and pepper, and stir in the 1/3 cup of cheese. Stir in the cooked ham. Use a spoon to pour around two tablespoons of the stirred filling to each well of the pan.
Bake Your Mini Quiches To Perfection
https://www.instagram.com/p/BamGhpXH3kX/?tagged=miniquiche
Place the pan in the oven and bake for 10 to 12 minutes. It’s important to make sure the quiche is completely cooked through, so slide a knife or fork inside one to test readiness. If the utensil comes out clean with little egg debris attached, these delicious bites are good to go! The crust being golden brown is another indicator that your tiny creations are ready to be eaten.
Serve with a side of fruit for brunch or along side a salad for a delicious dinner entreé. These mini quiches are the perfect combination of savory and satisfying, and you won’t want to waste a bite!
Entertaining and feeding guests will never be the same. One bite is all they will need to be hooked on this adorably edible masterpiece.
The post This Simple Quiche Recipe Is So Decadent, You’ll Feel Like A French Chef! appeared first on falafelandcaviar.com.
]]>The post These Garlic-Based Recipes Will Make Your Mouth Water Beyond Control appeared first on falafelandcaviar.com.
]]>This flexible ingredient can find a home in nearly any dish, so to help you out, check out the following creative recipes to jumpstart your garlic addiction.
‘Go Nuts’ Over Garlic
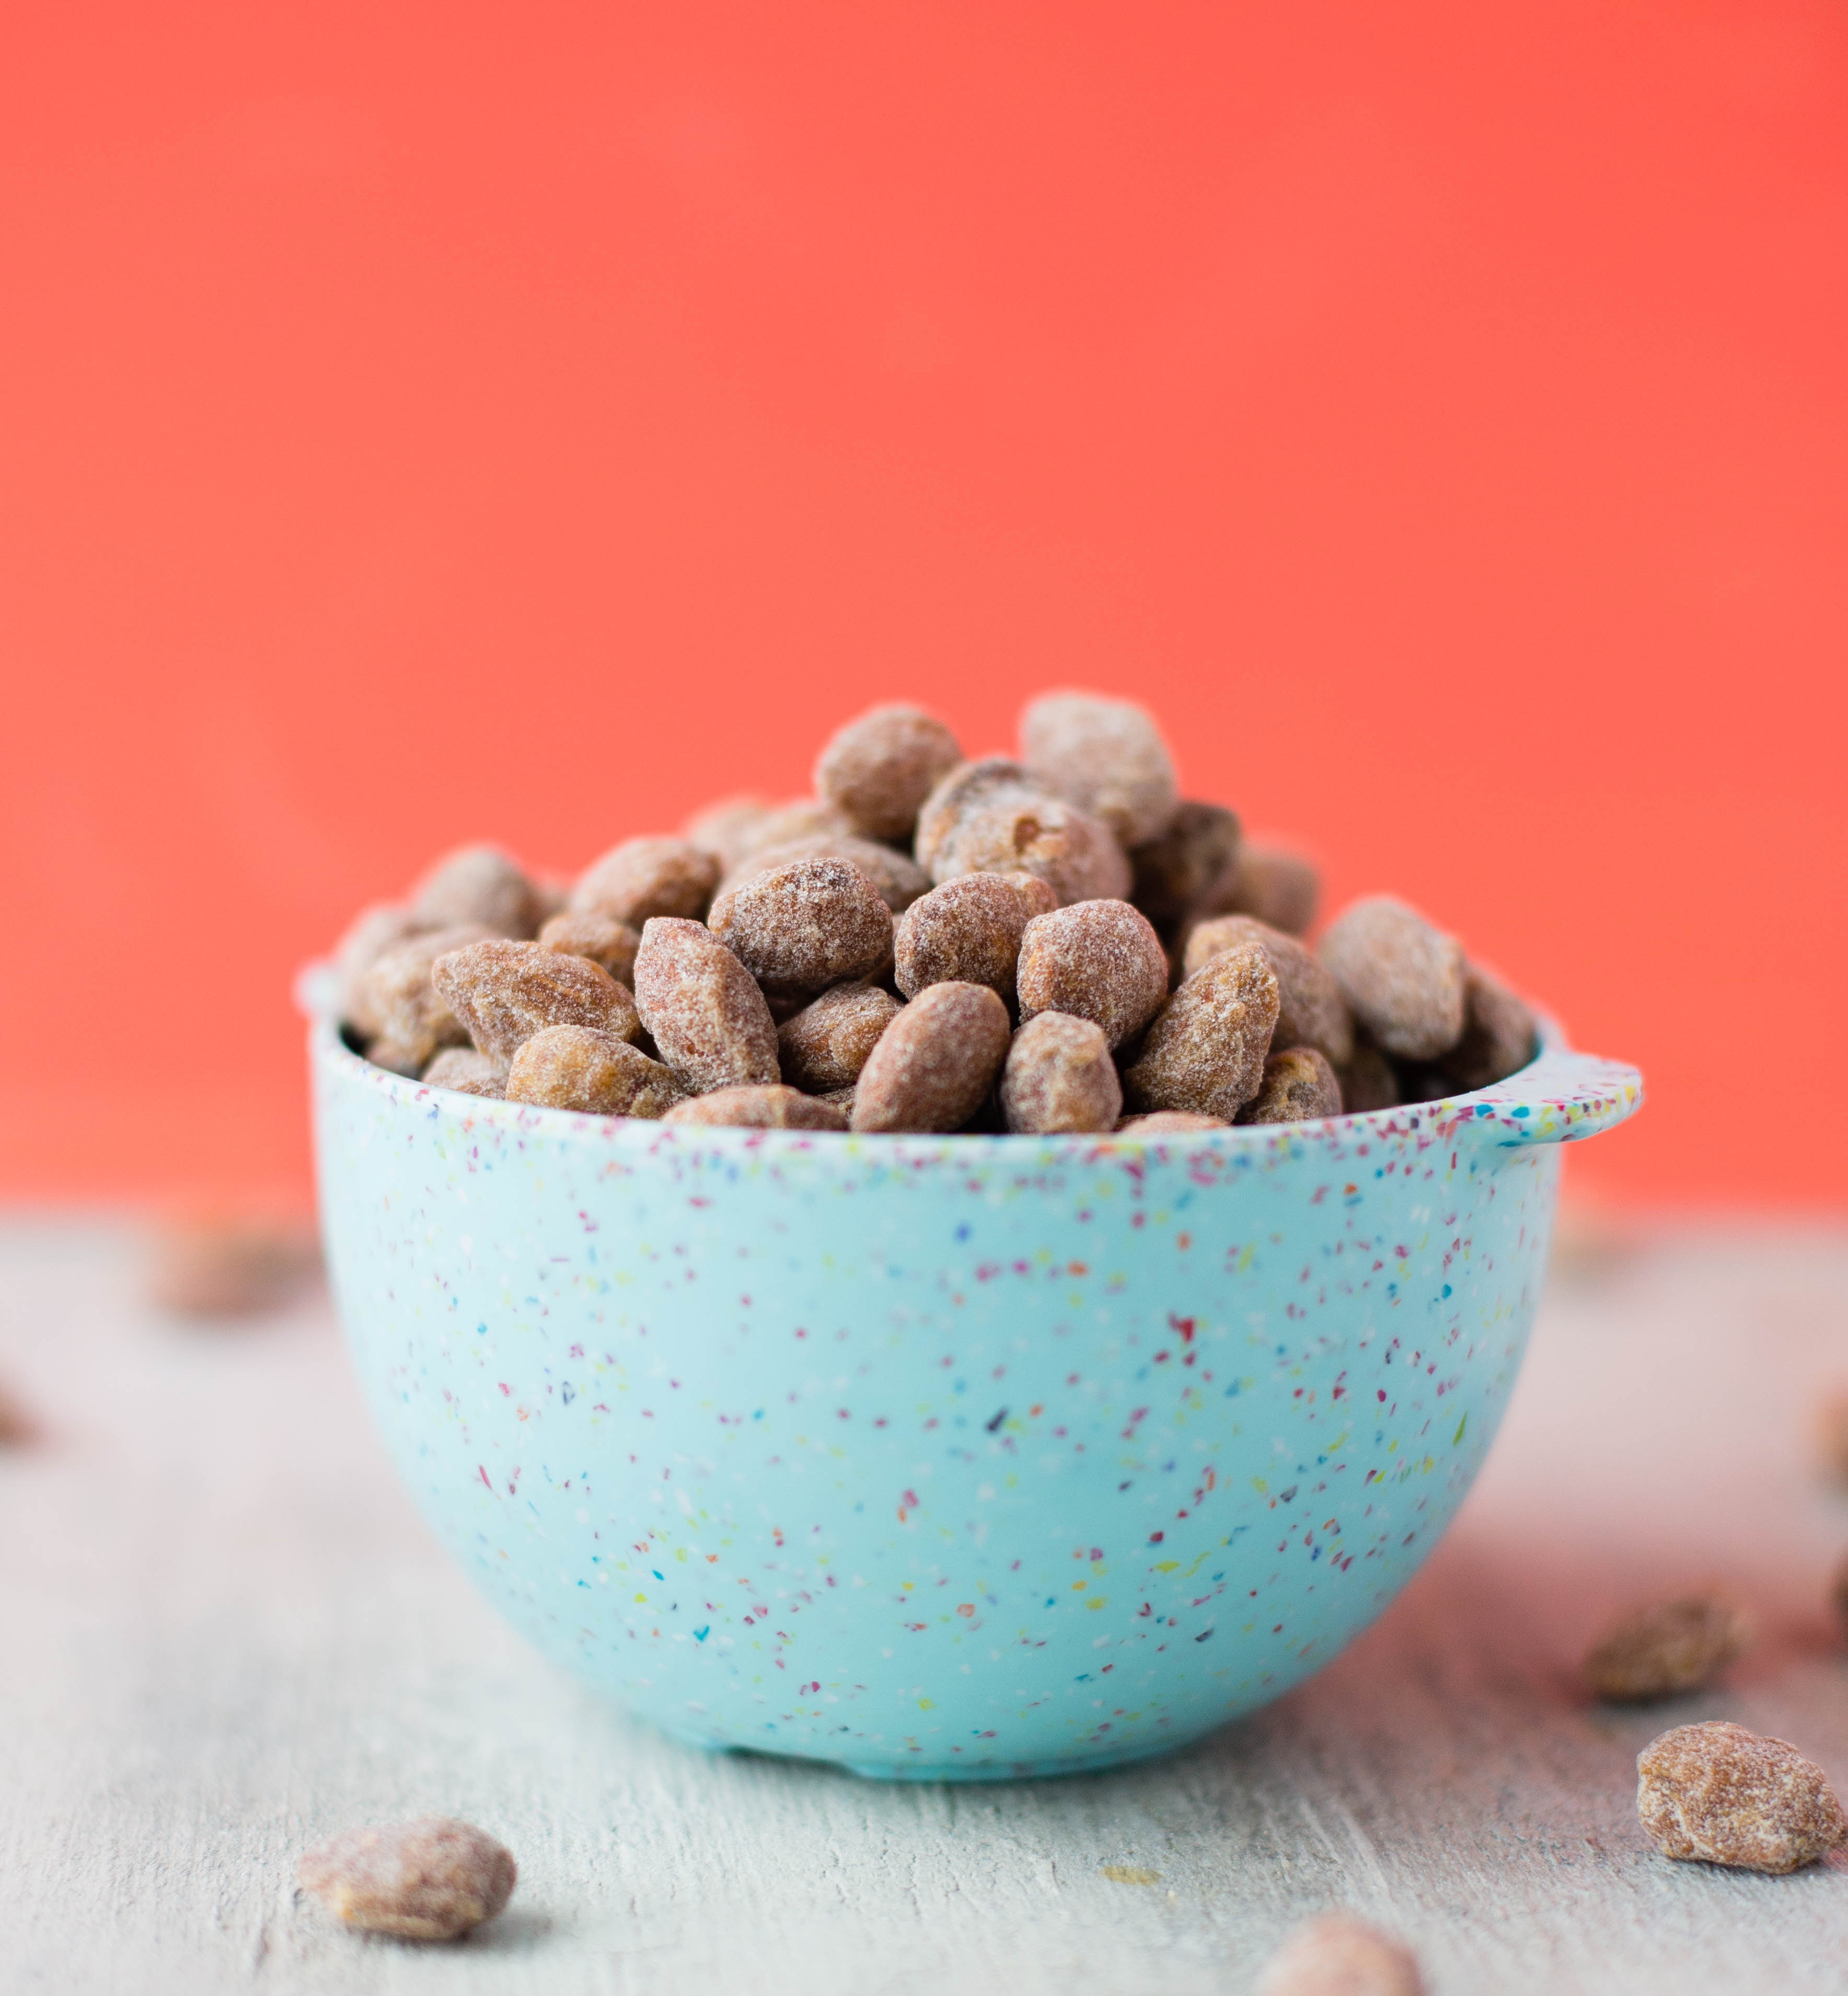
Do you like almonds? Great! They’re better with garlic. Follow this recipe to add a little zing to your favorite nut.
Ingredients:
3 cups of raw almonds
3 tablespoons of extra virgin olive oil
3-6 cloves of garlic
1/4 cup of fresh rosemary
1/2 teaspoon of Paprika
1 tablespoon of sea salt
Cooking Instructions:
Preheat your oven to 350 degrees. Then, mix together the almonds, olive oil and salt in a bowl. Finely mince the garlic and remove the leaves from the rosemary sprig.
Lastly, add them all to the almond mixture and spread it out in a single layer on a cookie sheet. Bake for about 20 minutes, stirring halfway through.
It’s Time To Get Angry With Your Pasta
https://www.instagram.com/p/BV5SDHCgORT/?tagged=pastaarrabbiata
This recipe is called “pasta arrabbiata” which literally translates to “angry pasta” due to the spicy, red pepper flakes. It has garlic though, so it’s all good.
Ingredients:
1/2 lb. bacon strips
2 garlic cloves
1/3 cup of olive oil
3 cans tomato puree
6 fresh basil leaves
1 teaspoon of crushed red pepper flakes
3 cups uncooked penne pasta
Cooking Instructions:
Cut the bacon into small pieces and brown them in a large skillet over medium heat until crispy (not burnt!). Then, sautee your minced garlic gloves in the same skillet for just about a minute. Add olive oil to prevent burning if needed. Now add your tomato puree, red pepper flakes, basil, and bacon.
Bring that mixture to a boil, reduce the heat and let it simmer for 15 minutes while stirring occasionally.
In the meantime, cook the pasta, drain it and top it with your sauce just before serving.
These Will Spoil Your Meal

They say never fill up on bread before a meal, but that’s nearly impossible with these garlic herb puff pastries.
Ingredients:
1/3 cup chopped mixed fresh herbs
2 garlic cloves
2 tablespoons of extra-virgin olive oil
1 sheet of frozen puff pastry
Salt and pepper
Cooking Instructions:
Preheat the oven to 400 degrees and mix the garlic, herbs, olive oil, salt and pepper in a small bowl. Unravel the thawed pastry on a floured surface to prevent sticking and coat it with the mixture.
Roll the pastry up and slice it into 1/4 inch thick rounds. Spread the rounds out on a parchment-lined baking sheet and bake for 15 minutes or until golden brown.
When Italy Meets Ireland
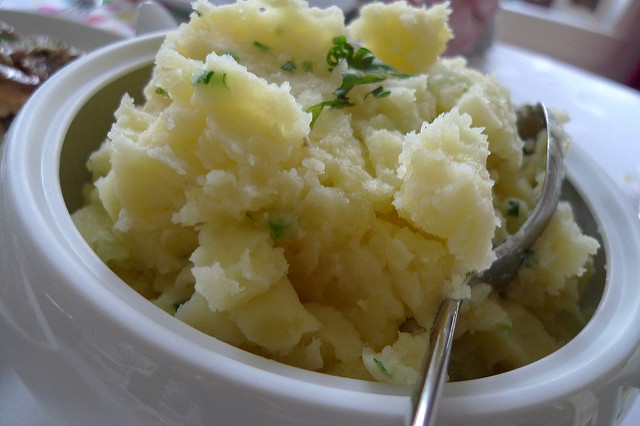
Tired of boring, old mashed potatoes? As with anything in life, make it better with garlic!
Ingredients:
4 lbs. red potatoes
1/2 cup water
1 teaspoon salt
1/2 teaspoon pepper
4 garlic cloves
1/4 cup butter
2/3 cup sour cream
1/2 cup cream
1/2 cup milk
Cooking Instructions:
Cut your potatoes into 1-1/2 pieces and place them in a greased slow cooker pot. Pour water over the potatoes and then toss in your salt, pepper, and minced garlic. Melt the butter and pour evenly over the potato mixture.
Then cover and cook on high for around four hours or until the potatoes are tender. When done, leave the water in the pot and mash the potatoes while adding sour cream and heavy cream.
Finish the mixture off with a hand mixer and add milk until it reaches your desired consistency.
How Much Garlic Is Enough Garlic?
https://www.instagram.com/p/ygeaE9xvt3/?tagged=fortyclovechicken
Ha, trick question! There’s never enough garlic.
That’s why we’re making Forty Clove Chicken with this recipe. Yes, that’s 40 cloves.
Ingredients:
8 chicken thighs
Salt and pepper
2 tablespoons unsalted butter
40 garlic cloves
1 1/2 cups of chicken broth
1 tablespoon of dried thyme
2 tablespoons of all-purpose flour
2 tablespoons of milk
Cooking Instructions:
First season your chicken thighs with salt and pepper. Melt your butter in a skillet and add the chicken skin-side down, making sure to sear both sides for around two minutes before removing from the pan.
Take the peeled garlic cloves and add them whole to the skillet. Cook for about five minutes or until golden brown. Now, add the chicken broth and bring that to a boil. Add the chicken and thyme.
Cover and lower the heat, allowing it all to simmer for around 30 minutes. Meanwhile, whisk some flour and milk in a bowl and add the juice from the skillet into this mixture to make a sauce.
Pour the sauce over the chicken right before serving.
The post These Garlic-Based Recipes Will Make Your Mouth Water Beyond Control appeared first on falafelandcaviar.com.
]]>The post Get A Kick Out Of These Egg Rolls At Your Next Gathering! appeared first on falafelandcaviar.com.
]]>One of the great things about this recipe is that most of the ingredients are most likely in your kitchen already!
What You’ll Need

Getting Started
Sauteé Your Vegetables
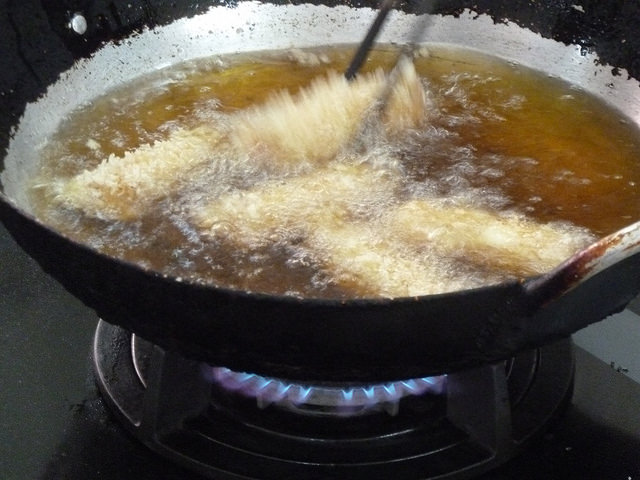
Getting To The Fryer
The post Get A Kick Out Of These Egg Rolls At Your Next Gathering! appeared first on falafelandcaviar.com.
]]>The post This Microwave Pizza In A Mug Could Be Your New Favorite Snack appeared first on falafelandcaviar.com.
]]>How To Make Pizza In A Mug
You’ll be pleased to learn that you should have pretty much everything you need already in your kitchen to make a mug pizza.
The dough is, of course, the foundation. It’s made of flour, salt, baking soda and baking powder, milk, and olive oil. If you don’t have any of those things handy, they’ll have them at your local grocery store and they’re all cheap.
https://www.instagram.com/p/BKxdk90Agv8/?tagged=pizzainamug
Everything else you need is what you’d expect for any pizza. You can add a marinara (or any red sauce that you like) to cover the dough. Then sprinkle with cheese and some toppings and you’re good to go. There is no definitive “best-tasting pizza” topping combination; you can go wild and there’s nothing that you would normally put on a pizza that won’t work with this recipe.
Getting The Dough Together
For one mug pizza, you’re going to need half a cup of all-purpose flour, a quarter of a teaspoon of baking powder and another of baking soda, 1/4 cup plus 2 extra tablespoonfuls of milk, and 2 tablespoons of olive oil.
It doesn’t get easier to make dough than this for any recipe, either. Chuck every ingredient into the mug, then stir to mix the ingredients together. As a doughy texture begins to appear, use your fingers to flatten it out so that it forms an even layer in the mug.
Don’t worry too much about making any of this perfect. You’re going to eat this pizza straight from the mug, so nobody will know if it’s a little uneven on the surface and it won’t change the taste in any way.
Once you’ve got your dough ready, it’s time to get this little pizza ready for cooking. If you’re using sauce, spread it the top and don’t be stingy with it. Then add your toppings. We recommend a traditional mozzarella cheese as your cheese, but you can pick anything that melts, of course.
Add some meat and veggies as you prefer and be as generous as you like. Once you’re done with toppings, it’s time to cook!
Cook the pizza on high power for one to two minutes in the microwave. You want the cheese to be melted and for the dough to have risen to be sure of a good mug pizza, so don’t be afraid to pop it back in for a few more seconds if it seems undercooked.
Eating the pizza probably doesn’t need instructions—but basically, use a spoon and just dive in!
The post This Microwave Pizza In A Mug Could Be Your New Favorite Snack appeared first on falafelandcaviar.com.
]]>